




Introduction
There was no obvious rain during the night, yet water droplets cover the tent fabric when you wake up. One end of the sleeping bag feels damp, and moving the fly sends a few drops toward the floor.
Does this mean the tent has failed?
Condensation is one possible explanation. Moisture released inside the tent can collect on colder surfaces, even when the shelter is successfully keeping rain outside.
However, water can also enter through damaged areas, an exposed doorway, or problems around the groundsheet. Start by observing where and when it appears, then choose the appropriate response.
Start With Where and When the Water Appears
Moisture Across the Inner Surface
Droplets spread across a surface can suggest condensation, particularly when they appear overnight without rainfall.
In a double-wall tent, moisture may collect on the underside of the outer fly. Movement or contact can dislodge it. A single-wall shelter may have condensation directly on the surface beside the occupants.
These observations are useful clues, but they do not establish the cause by themselves. Consider the weather, ventilation, and location of the moisture together.
Water Around Seams, Damage, or the Floor
Look for a more specific pattern.
Does water repeatedly appear beside one seam? Is there visible damage nearby? Did rain enter while a door was open? Is the wettest area on the downhill side of the floor?
Inspect the ground and groundsheet as well. An exposed edge of a footprint or tarp can collect rain and direct it beneath the tent.
Floor water may also come from drips, spills, or wet equipment, so avoid assuming it has passed through the floor fabric.
More Than One Cause Can Be Present
Rain and condensation can occur during the same night.
For example, rain may increase surrounding humidity while campers reduce ventilation to keep weather out. A separate leak could also exist.
| Observation | What to investigate |
|---|---|
| Droplets over a broad inner surface | Moisture sources, surface cooling, and airflow |
| Repeated dripping from one location | Seams, fabric condition, and water pathways |
| Water around the floor edge | Drainage, groundsheet arrangement, doorway, and other sources |
| A damp patch on bedding | Contact with wet fabric, overhead drips, or wet belongings |
Treat the table as an investigation guide rather than a diagnosis.
Understand How Moisture Builds Up Overnight
People and Wet Gear Add Moisture
A tent is a small occupied space.
Breathing and moisture released from the body contribute water vapor. Damp clothing, towels, shoes, and other belongings can add more as they dry.
Some humidity was already present in the surrounding air before anyone entered.
You cannot remove every source, but you can manage wet belongings and provide the ventilation the tent was designed to use.
Colder Tent Surfaces Allow Condensation to Form
Condensation occurs when a surface becomes cold enough for water vapor in the adjacent air to turn into liquid droplets.
Tent fabric can become a collection surface as conditions change overnight. The presence of droplets does not automatically mean rain has passed through the material.
This explains why a waterproof tent can still be wet inside. Keeping external water out and managing moisture generated within the shelter are different tasks.
Weather and Tent Design Change the Result
Humidity, surface temperatures, air movement, occupancy, and shelter construction all influence what happens.
A double-wall tent can help separate occupants from moisture collecting on the fly, provided it is pitched correctly. It does not guarantee a completely dry morning.
Single-wall shelters require attention to their own ventilation arrangements and usable interior space.
Price alone does not determine condensation. Follow the instructions for your particular design rather than expecting any tent to eliminate it under all conditions.
Make a Few Adjustments Before Going to Sleep
Use the Tent’s Ventilation Features as Intended
Identify the vents, mesh panels, door options, and rainfly adjustments available on your model.
Use them according to the design and weather. Maintain suitable airflow while protecting against rain and wind.
Avoid automatically sealing every opening because the evening feels cool. At the same time, do not follow a blanket instruction to open all doors regardless of conditions.
Prepare warmth through appropriate sleeping equipment and clothing rather than relying on closing every ventilation route.
Keep the Fly Properly Pitched and Wet Gear Organized
Pitch the tent and tension the fly according to its instructions.
Where the design requires a gap between layers, preserve that space. Loose or incorrectly arranged fabric can interfere with airflow and bring wet surfaces closer to the inner tent.
Organize damp equipment separately from dry bedding. Use an appropriate covered location where conditions and site rules allow, and keep ventilation openings clear.
During suitable daytime conditions, take opportunities to dry wet items instead of carrying the same moisture into the next night.
Choose a Suitable Pitch and Groundsheet Setup
Use an approved site with appropriate drainage. Avoid depressions where water collects.
Fit the groundsheet according to the tent instructions. Keep excess material from forming a rain-catching edge outside the protected footprint.
Site safety comes first. Do not choose a hazardous location beneath damaged branches or in a flood-prone area simply because it appears sheltered.
You can improve the setup, but you cannot control every environmental factor. Plan for some moisture management even after making sensible adjustments.
Protect Sleeping Gear and Set Up a Dry Charging Area
Keep Bedding Away From Wet Surfaces
Arrange sleeping positions with usable space around them.
Avoid pushing the sleeping bag against a wet wall or leaving spare clothing beneath a dripping area. Water can transfer onto belongings through contact without proving that outside rain penetrated the fabric.
Protect dry spare layers and other important items in suitable storage. Keep access practical so they can be retrieved without spreading wet gear across the sleeping area.
If the tent is consistently crowded, review its usable space alongside the amount of equipment stored inside.
Keep Electronics and Connectors Away From Drips
Choose a dry place for phones, rechargeable lights, cables, and batteries.
Check above and beneath that location. A pocket near wet fabric or a low point on the floor may not remain dry overnight.
Do not connect charging equipment while its connectors are wet. If you suspect water has entered a device, stop using or charging it and follow the manufacturer’s guidance. Surface drying alone does not establish that it is safe to operate.
Keep drinking bottles and wet clothing away from the charging area.
Where the Merpower GP35SE Fits
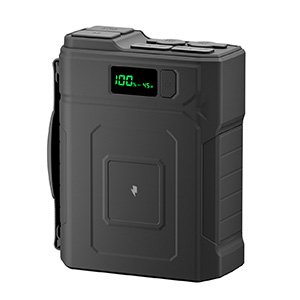
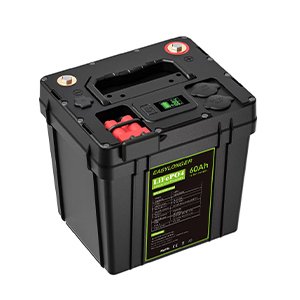
For a car-camping setup, the Merpower GP35SE can provide backup charging for compatible phones, rechargeable lights, and other supported small devices.
Its 192Wh LiFePO4 battery pack and USB outputs offer a way to replenish suitable equipment at a properly arranged charging location.
Select a stable, dry position that meets the product’s ventilation and operating requirements. Check the device, cable, and output compatibility before connecting.
Keep the GP35SE clear of wet fabric and pooled water. Do not wrap an operating battery in clothing or seal it inside an unsuitable container to protect it from moisture.
Its role here is device charging. Ventilation, tent setup, and wet-gear management remain the measures that address condensation.
Handle a Wet Morning Without Making the Next Night Harder
Remove Surface Moisture and Air Out Suitable Gear
Use an absorbent cloth suitable for the fabric to gently collect accessible droplets. Avoid pushing water toward dry equipment.
When conditions permit, ventilate the shelter and air equipment according to its care instructions. Manage wet and dry items separately.
Do not use an ordinary fuel-burning camping stove inside the tent to warm or dry it. Carbon monoxide and fire hazards make this an unsafe response.
If bedding or clothing becomes too wet to maintain suitable comfort and warmth, reassess the trip and seek an appropriate dry location.
Separate Wet Packing From Long-Term Storage
Sometimes departure must happen before the tent dries.
Pack it in a way that limits moisture transfer to important dry equipment, then arrange an opportunity to unpack and dry it as soon as practical.
Temporary wet packing should not become extended storage.
At home, check the fly, inner tent, floor, corners, and other areas that can retain moisture. Let everything dry fully before storing it according to the manufacturer’s instructions.
Avoid improvised high-heat drying methods. Cleaning, drying, and storage requirements depend on the materials and construction.
Know When the Tent Needs Inspection or Repair
Look for Repeatable Problems and Visible Changes
A recurring wet area deserves investigation.
Check for holes, damaged stitching, seam problems, and changes such as peeling or deteriorating coatings. Revisit the pitching method and groundsheet arrangement as well.
Condensation can occur in an otherwise functioning tent, but that does not explain every water problem.
If you cannot identify the cause, ask the manufacturer about an appropriate inspection method. Avoid high-pressure testing or unapproved treatments that could damage the shelter.
Record the Conditions Before Contacting the Manufacturer
Useful information includes:
- Tent model and approximate use history.
- Weather and ground conditions.
- How the tent and footprint were arranged.
- Ventilation settings.
- Where water first appeared.
- Whether the same pattern has happened before.
- Clear photographs or video.
These details help support teams distinguish possible causes.
Use repair or waterproofing products only when appropriate for the material and problem. Applying a treatment to the whole tent without identifying the issue may not address it.
Conclusion
A wet tent interior calls for observation before assumptions.
Identify possible water sources, check the pitch and ventilation, and organize wet belongings away from dry sleeping equipment. Give electronics a suitable charging location, then dry and inspect the shelter after use.
Condensation may not disappear completely, but a better routine can reduce its effect on your comfort and equipment—and make the next night easier to manage.
FAQs
Can a Waterproof Tent Still Have Condensation?
Yes. Waterproofing helps resist outside water, while condensation can form from moisture already inside or around the tent. The two issues can occur independently or together.
How Can You Tell Condensation From a Tent Leak?
Look at the location, timing, weather, and repeatability. Broad droplets may suggest condensation, while a recurring localized problem may warrant inspection. Neither pattern alone proves the cause.
Should You Close Every Vent to Stay Warm?
Avoid treating this as a universal solution. Use the tent’s ventilation features according to its instructions and the weather, alongside suitable sleeping equipment and clothing.
Why Is the Outside of My Sleeping Bag Damp?
Possible causes include contact with wet fabric, falling droplets, wet belongings, or other moisture sources. Check where the dampness starts before assuming the tent leaks.
Can You Pack a Tent While It Is Still Wet?
Temporary packing may be necessary during travel. Keep moisture away from important dry equipment and unpack the tent for drying as soon as practical. Dry it fully before storage.
Where Should You Charge Electronics in Damp Camping Conditions?
Use a stable, dry location permitted by the equipment instructions, away from drips and pooled water. Keep ventilation clear and do not charge through wet connectors.
Does a Portable Battery Help Remove Tent Condensation?
A battery supplies energy to compatible equipment; it does not remove moisture by itself. Address condensation through appropriate ventilation, setup, and moisture management.